Introduction
This tutorial describes how you can make a simple dotted sea lane or road for your map using Photoshop 7.0.
A RAR file containing the PSD image of the map shown in this tutorial can be downloaded here.
This tutorial describes how you can make a simple dotted sea lane or road for your map using Photoshop 7.0.
A RAR file containing the PSD image of the map shown in this tutorial can be downloaded here.
You first need to set up the brush. Click on 'brushes' and then on 'brush tip shape' (figure 1). Slide the 'diameter' and 'spacing' bars to a value that you feel looks good for your map, and remember to set the foreground colour to white.
In this example (figure 2) I have set the diameter to 5 pixels, and the spacing to 150%.
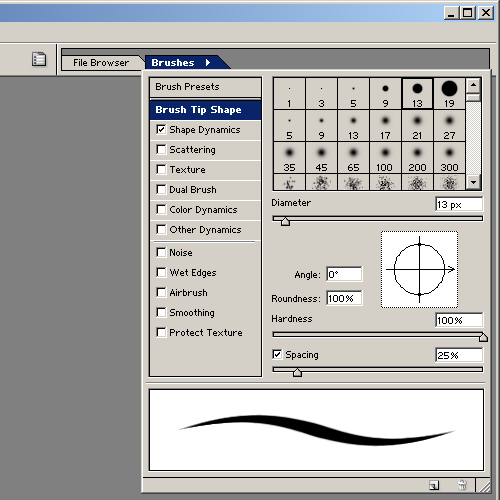 Figure 1 |
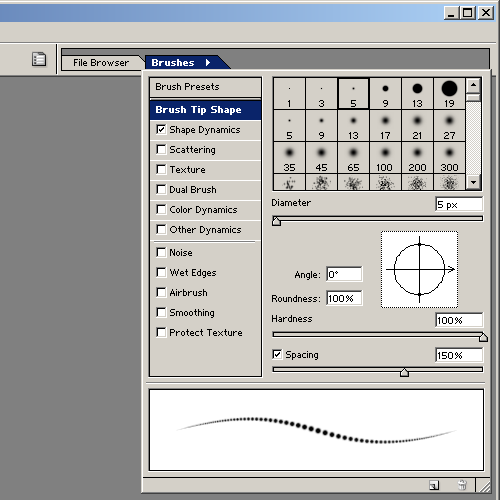 Figure 2 |
Next, you will use the 'pen tool' to make the path that your sea lane will follow. The 'pen tool' is located in the 'tools' window (figure 3), its icon depicting a fountain pen.
In this example the sea lane will start at Port Wobble on the south-eastern shore, and will encircle the northern half of the island towards Port Wibble on the west coast.
Create a new layer. With the 'pen tool' active, click once at your preferred starting point (in this case, at sea outside Port Wobble). You will see a red dot has appeared (figure 4).
Then place the mouse pointer over the first corner and keep the left mouse button pressed. You will notice a straight line has appeared between Port Wobble and your current mouse position (figure 5).
While keeping the left mouse button pressed, move the cursor to the left and up a bit (or northwest, if you will), and you will see that the straight line has now begun to curve (figure 6).
Repeat this process until you reach Port Wibble (figure 7).
 Figure 3 |
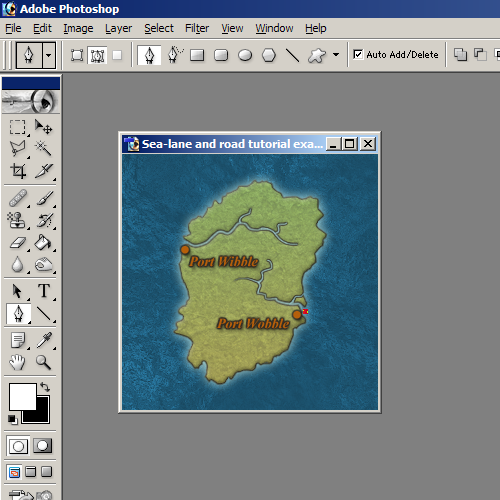 Figure 4 |
 Figure 5 |
 Figure 6 |
 Figure 7 |
Now right click on the path, and select 'stroke path' (figure 8). Make sure the brush tool is selected and click on OK (figure 9).
As you can see, the path has been stroked with the dotted white brush now (figure 10). Hit Escape twice to remove the path and your brand new sea lane will remain. You can play around with various 'blend modes' to see what style you prefer. In this example, I have set the 'blend mode' to soft light (figure 10).
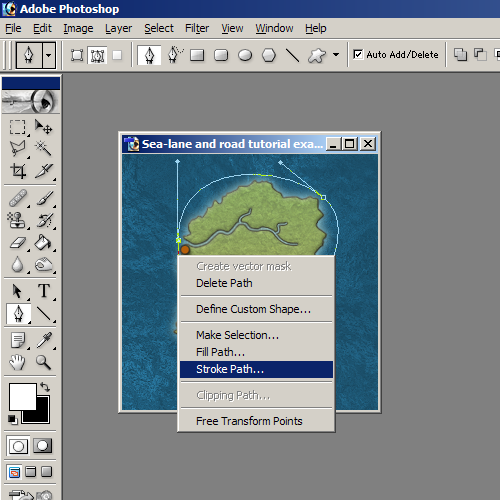 Figure 8 |
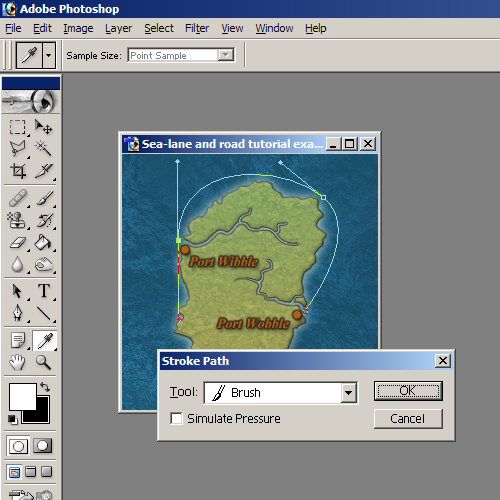 Figure 9 |
 Figure 10 |
 Figure 11 |
Roads are made the same way, the only difference is their colour. Select a suitable shade of brown and repeat the steps above. In this example, I have set the 'blend mode' to multiply (figures 11 and 12), but experimentation is always good.
 Figure 12 |
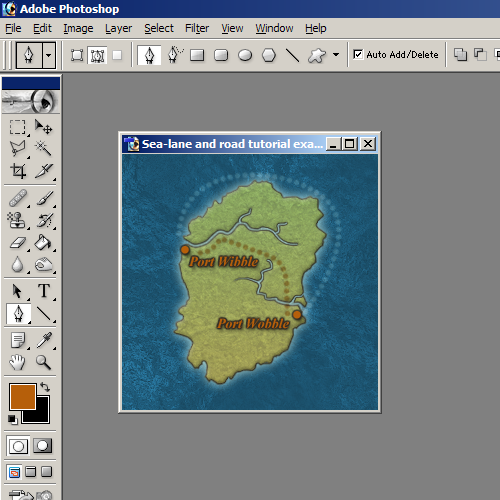 Figure 13 |